Tech Article
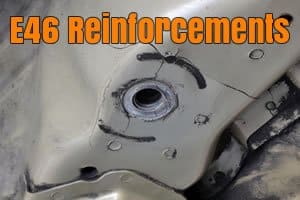
BMW E46 Chassis Reinforcement Guide
Aug
The BMW E46 chassis is a fantastic platform for a track or race car. They are well balanced, inexpensive, and easy to work on. Unfortunately, just like with any car, there are some weak areas that need to be addressed. The good news is that these shortcomings are well know, documented, and solutions readily available.
Morehead Speed Works (MSW) has been building, modifying, repairing, and racing dozens and dozens of E46s in a variety of configurations. We’ve built and raced very basic Spec E46s all the way up to extremely fast V8 powered monsters. Through our experience, we’ve seen what works and what doesn’t. Perhaps more importantly, we’ve also seen what is just plain overkill when it comes to reinforcing your chassis.
There are a number of areas on the E46 chassis that need to be addressed to have a reliable and rugged track weapon. These area apply to all E46s (coupe, sedan, convertible, wagon) and to all disciplines of motorsports and even just spirited driving.
Note on caged cars: caging your vehicle will most definitely increase its torsional rigidity, but has nothing to do with preventing the failure of sheet metal in critical areas that even street cars are susceptible to.
The areas on the chassis we’ll be addressing are (from front to rear):
- Front Anti-Roll Bar (sway bar) Mounts
- Front Subframe Engine Mounts
- Transmission Crossmember
- Front Subframe Balljoint Mounts
- Front Strut Towers
- Trailing Arm Pockets
- Rear Subframe to Chassis Mounting Points
- Cage Tie-Ins
Looking for the “Easy Button”? Check out our complete E46 Chassis Reinforcement Kit.

Reinforcements
Front Anti-Roll Bar (sway bar) Mounts
This is a pretty critical failure when it happens, as it creates an instant shift in the car’s balance. If you’re in the middle of a race and all of a sudden your front sway bar becomes no longer attached to the car… well you can imagine the results.

Reinforcements
Solution: For years we made one-off reinforcement plates to strengthen this spot on the car. Recently we came up with a simple plate reinforcement water-jet cut from 1/8″ steel. This plate simply slides over your roll bar studs and is welded into place. If your studs have already ripped off, you can weld a bolt to the back side of the plate prior to installation. You may even upgrade from 8mm to 10mm bolts for additional strength, though we haven’t found that necessary for typical off-the-shelf anti-roll bars.
Front Subframe Engine Mounts
These are the least likely area of failure from our experience, but we also typically don’t use solid engine/trans mount. However we do reinforce all the cars we build as a precaution, regardless of the type of powertrain mounts used. If you plan to use solid (this includes stiff polyurethane, Delrin, Nylon or UHMW) mounts, you absolutely must perform this reinforcement upgrade. The stock mounts are rubber or fluid filled rubber, which cushion some of the shock of the heavy mass of engine & trans coming down hard on the subframe. We recommend against the solid mounts, but I’ll save that for another post.

Reinforcements
Solution: These simple reinforcement plates are welded into the engine mount pockets, then another plate partially closes in the pocket for additional strength. The subframe must be removed from the car in order to perform this job, though the engine may remain in the car. This is also a good time to install a baffled oil pan and replace your front suspension components..
Transmission Crossmember
While this isn’t a chassis weakness, it goes hand in hand with the front subframe reinforcements and dealing with stiffer drivetrain mounts. The stock transmission crossmember is a thin cast aluminum part and is prone to developing cracks near where the transmission mounts are bolted. Running stiff transmission mounts exacerbates this issue and can lead to complete failure of the crossmember. We’ve seen the mounts come completely free of the crossmember.
Solution: Fortunately our friends over at Advanced Auto Fab developed a heavy duty, fabricated aluminum crossmember that is a complete bolt in solution.

Drivetrain
Front Subframe Balljoint Mounts
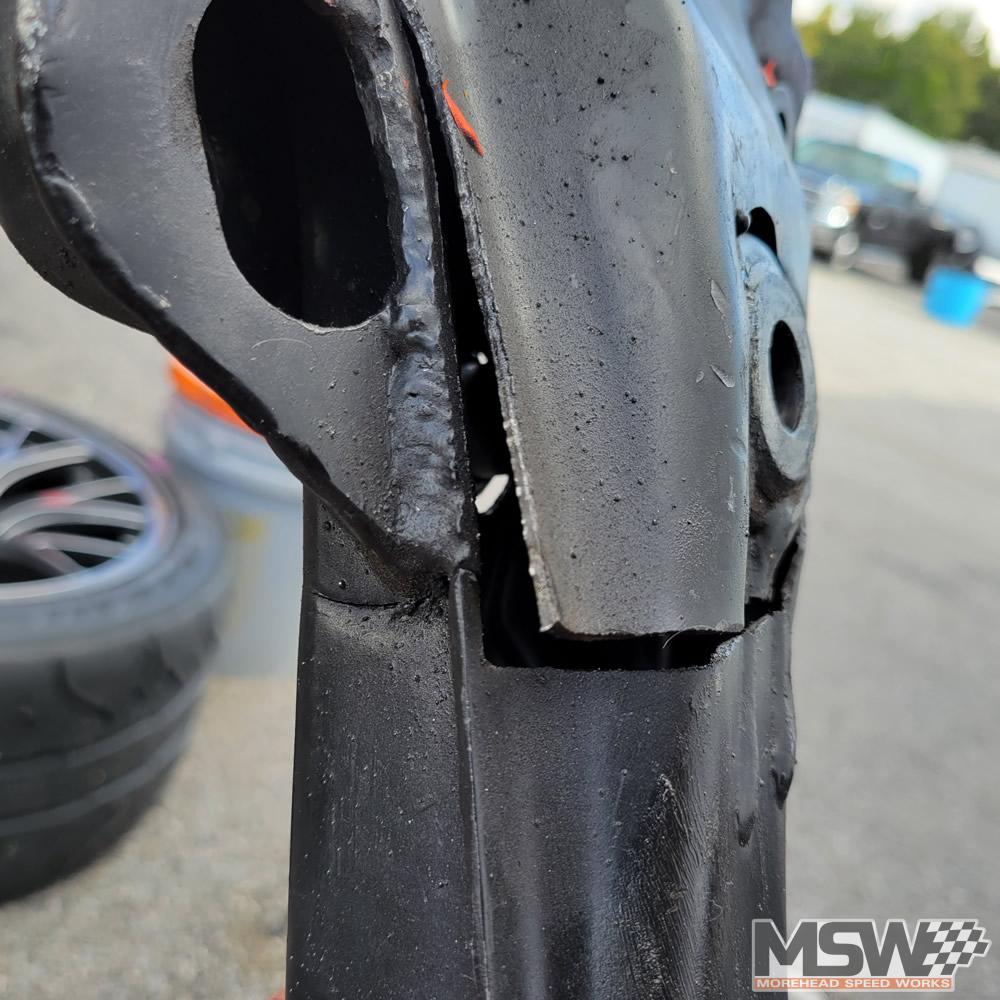

Reinforcements
Solution: We began developing these subframe reinforcements immediately after our on-track failure took us out early in an endurance race. These plates go on the top and bottom of the front subframe, sandwiching the balljoint mounting sleeve. Unlike some other kits on the market, ours are pre-bent for the left and right side of the subframe.
This kit adds much needed extra material around the ball-joint mounts, fully securing them in place.
Front Strut Towers
Solution: Just like on the E36, BMW recognized this was a problem and came out with strut tower reinforcement plates. These plates are made from a thicker steel and are a simple install. They are installed between your strut hat or camber plate and the bottom of the tower. While it isn’t absolutely necessary to weld them in place, we always do on our race cars. Just some stitch welds around the perimeter of the plate is enough to hold them in place.
Note: before installing the plates, it is necessary to return your towers to their original shape and fix any cracks. If the top of the tower has deformed, usually this can be easily solved by taking the weight off the front of the car, placing a piece of soft wood (2×4) over the tower and smacking it with a small sledge hammer until it’s flat once again.
For street cars where we don’t want to burn off the engine bay paint by welding, we’ll secure the plates in place with panel bond epoxy.

Reinforcements
Trailing Arm Pockets
The E46 predecessor, the E36, had a bad habit of the threaded bosses pulling out of the rear trailing arm pockets. This was addressed with reinforcement plates. On the E46, the problem was somewhat cured. The threaded bosses are much stronger, but now the weak point is the spot welds that attach the pocket to the chassis. While this is the least likely failure on this list, it’s results are the most catastrophic if you have a complete separation.
The worst case scenario is the pocket rips from the car and the trailing arm digs into the track, essentially pole vaulting the car into the air. I’ve only seen it happen once, but it’s enough to make you address the problem.
The video above will certainly make you want to go out and immediately weld your trailing arm pockets. While this is a rare occurrence, the results are pretty extreme.
Solution: Thankfully, the solution to this problem is rather simple and requires no parts. The pocket just needs some additional stitch welding around its perimeter to add some strength to the pockets attachment to the chassis. This is a somewhat difficult area to weld due to the thick seam sealer applied over all the metal. Make sure as much of this seam sealer is removed as possible to ensure clean welds. It is not necessary or recommended to completely weld the pocket. Just a few stitch welds spaced an inch or so apart will do the trick.
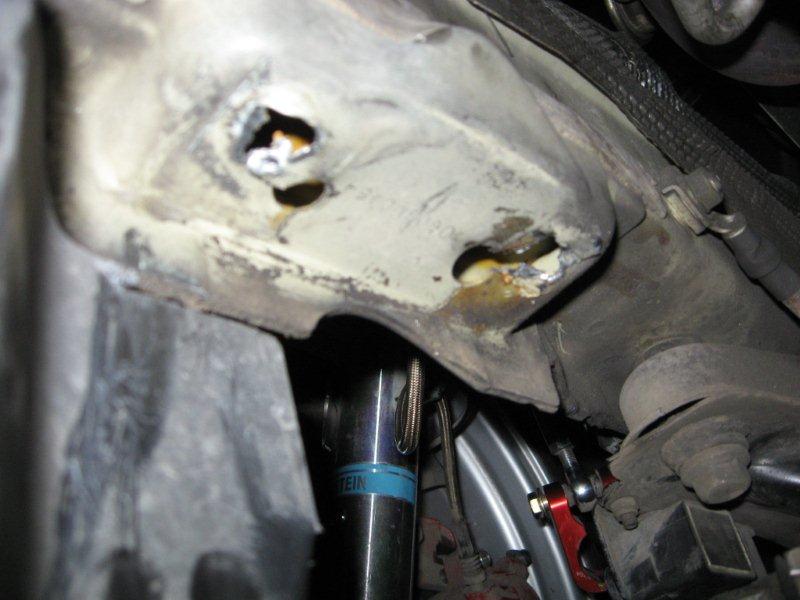
Rear Subframe to Chassis Mounting Points
Finally, the most notorious of the the E46’s chassis weaknesses. Everyone who’s even remotely familiar with these cars has read about this one. The problem is found in the trunk floor where the rear subframe mounts to the chassis via two long bolts and two thread in studs. These mounting locations take the full brunt of the rear suspension movement as well as all of the torque from the drivetrain. Eventually you will find cracks in the sheet metal forming near these holes.

In a worse case scenario you may actually find the metal totally separating, and the threaded bosses actually pulling through the bottom of the car. We haven’t seen this in person yet, but it’s well documented on the internet. In this case you will need to make repairs before reinforcing anything, sometimes the best solution is a brand new floor, which can still be purchased from BMW as new sheetmetal.
We have our own kit which we’ve found to be the best mix of simple design, cost, and strength. Prior to installation you must repair any existing cracks. We stop drill the crack, then weld over the crack prior to installing the plates. We’ve run these plates on cars that have hundreds of racing hours in long endurance races, including the 25 hours of Thunderhill. They’ve been beaten up pretty good and still holding strong.
What about epoxy? I’ll stop you right there. Don’t, just don’t. Despite what you might have seen on some Youtube video, epoxy is not a viable method for attaching reinforcement plates to your chassis. It doesn’t repair any existing damage, and you’re not joining the two pieces of metal. You’re working in a garage/shop with 15+ year old metal. Regardless of how clean you get it, it’s not a controlled and sealed environment that OEM’s utilize with bonding parts. You also don’t have a proper jig for clamping the parts in place and allowing them to properly cure. The two joining pieces also aren’t perfectly matched, leaving high and low spots where voids will form.
We’ve had epoxied repairs come through the shop, and all the reinforcement plates easily popped right off with a light chisel and hammer smack.
Solution: There are numerous parts on the market to address this problem, however many are just over engineered, expensive, and unnecessary for 99% of E46 owners. What we’ve found is that simple reinforcement plates work just fine for the vast majority of racers and are allowed by almost all classes. That said, there are a wide variety of plate kits available today, and we’ve tried them all. While they all do the job, some just fit better than others and have more surface area or more edges to weld.

Note on Bushings: The type of subframe and differential bushings you run can have an effect on your subframe mounting. The stock bushings are rubber and were made for comfort in a street car. The downside is this leads to excessive movement of the rear subframe. Not only is this unwanted in a race car from a handling standpoint, it also puts additional stresses on those four mounting points discussed earlier. For race car applications we always recommend going to a solid mount (aluminum or similar) solution. This will remove the movement of the subframe, locking it in solid to the chassis floor. Likewise, we recommend solid differential bushings for race (or track) cars, as it eliminates the movement of a large mass of iron and steel. For street cars, we would typically recommend a street type polyurethane mount (Powerflex Purple) or fresh OEM rubber, all in conjunction with the reinforcement plates.


Cage Tie-Ins
Tying in your suspension pick up points, subframe mounts, and front strut towers to you cage is a popular procedure among racers, and there are many benefits to doing so. First off; is it legal for the class you intend to run in? Every sanctioning body will spell out very specifically how many cage points you are allowed. Some classes even regulate how many bars, and some even have a “spec cage”. Keep in mind that you may not always run in the same class, redoing cage work is not easy or cheap.
So, if you are confident that you will be running a car in a class that allows for additional tie-ins, there are some good reasons to do so. That said, none of these additional cage points are a replacement for the reinforcement procedures mentioned above. Typically, tying into things like the strut towers, rear shock towers, and rear subframe are done to add even more torsional rigidity to the car. You are essentially building a tube car within a unibody-car.
When this type of works becomes necessary is when you are building a car with very stiff suspension, lots of grip (both mechanical and aero), lots of power, and lots of brakes. All these things will put further strain on a street car unibody, causing twisting and bending of metal. We’ve seen it create tears in sheetmetal on E36s that were running extremely wide R-comp slicks with aero, S54 power, and big brakes.
Another reason for a rear shock tower tie-in is if you plan to go to a true coilover. The rear shock towers were never intended to carry the weight of the car, especially on stiff racing setups. So if you plan to run a true rear coilover, you absolutely must tie in those points to your cage.
The downside to all of this extra reinforcement is obviously cost and weight. There is no getting around the cost, but the weight penalty can be mitigated to a point. Again this is going to depend on your racing class rules, but by essentially building a tube frame car within a unibody car allows you to remove some of the excess structure. A properly designed and built cage with appropriate tie ins will take the majority of the loads, and your car’s original chassis becomes more of just a shell.
